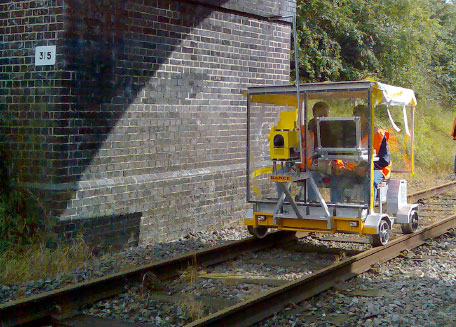
For the accurate mapping of track structures and tunnel clearance.
The laser clearance system is used for fast and high accuracy clearance measurement for railway track. It consists of a laser unit linked to a laptop computer equipped with our specially designed software. The system is portable and easy to install and operate. The laser beam is invisible and harmless to the naked eye.
The system uses “real time concept” enabling operators to visually observe, measure and record the position of the track and structures using 360º scanning. By comparing the laser profile with the structure gauge, on the laptop screen, any infringement immediately shows up.
LASER GAUGING
FOR TRACK STRUCTURE & TUNNEL CLEARANCE
The Clearance Laser System is fitted to rail bound, road/rail vehicles and alumicart mobile trolleys for the inspection and calculation of obstructions within the general clearance envelope.
All clearance data is measured from the centre-line of the track and rail-top. It also measures the position and distance of the centre-line of adjacent tracks. It operates in both directions with the same efficiency.
The Clearance Laser System can measure railway clearances both day and night. It maintains short track occupancy and follows a “non-touch” concept. The general accuracy is +/- 10 mm and a calibration target is used to obtain the accuracy under all conditions.
The Clearance Laser System scans 360-degrees and is a time of flight concept (LADAR).
The Clearance Laser System gathers data as follows together with the identifying of any infringing objects:
- distance in miles, feet or kilometres
- track super elevation
- the name or number of obstructions
- curve
- track identification
- track segment
- direction of travel
- date of data collection
The Clearance Laser System software is capable of generating “standard cross sections” whilst stationary, “minimum composite cross sections” whilst moving on track and “average composite cross sections” for tunnel volume calculation. Resulting co-ordinates is in imperial or metric with “X” being width, “Y” as height and “Z” being distance in miles, feet or kilometres.
Performance
The laser system meets the following operating criteria:
- minimum scanning speed of 9,600 to 43,200 points/sec
- minimum accuracy of 10 mm root mean square on individual points
- high resolution (one point every 0.125 – 0.375 degrees)
- scans 360 degrees
- has a measuring range from 0-70 metres.
- the system is 100% eye safe (Laser Class 1)
- the system is capable of operating in darkness and full daylight.
- the laser unit is light, compact and temperature controlled.
Power Supply
The clearance laser operates on 24 volts DC and any electrical filtering system that may be required is provided.
Travel Speed
The system has the capability of saving minimum and average composite cross sections at speeds up to 90 Km/hour. Greater accuracy is obtained at lower speeds.
Software/hardware
The system is delivered with (or customer has) Windows XP PRO as operating system (both for the collecting and the processing of the data from the Clearance Laser System). The software offered with the Clearance Laser System is capable of simulating and on screen show any load, train or wagon configuration, including vehicle centres and overhangs. The software allows viewing the results in graphic form on screen.
An electronic odometer for accurate distance readings and an electronic pendulum for super elevation (cant and cross level) are included.
 Download Specification Data